Exporting a Title and Graphics Playlist to Broadcast Pix's Rapid CG
Please join us in welcoming our newest integration partner, Broadcast Pix!
With their help, we've added the ability to export titles and graphics to their Rapid CG software. The integration gives your team the ability to enter information for titles and graphics into your scripts in Rundown Creator.
Later, right before you tape or go live or do whatever it is you do, you can simply export a file from Rundown Creator, and import it into Rapid CG. Rapid CG will then build a playlist of all of your titles and graphics-- in order, and with the correct template and template data. That data can include what text each title should say and what images should be used.
To create a script template:
With their help, we've added the ability to export titles and graphics to their Rapid CG software. The integration gives your team the ability to enter information for titles and graphics into your scripts in Rundown Creator.
Later, right before you tape or go live or do whatever it is you do, you can simply export a file from Rundown Creator, and import it into Rapid CG. Rapid CG will then build a playlist of all of your titles and graphics-- in order, and with the correct template and template data. That data can include what text each title should say and what images should be used.
Table of Contents
- What You'll Need
- The Little Bit of Tedious Setup Required to Get You Up and Running
- The Fun Part (if you're a geek like us)
What You'll Need
- Rapid CG v3.5 or higher (not the LT version)
- Inscriber TitleMotion
- A Rundown Creator Pro or Educational subscription
- Administrator privileges in Rundown Creator
The Little Bit of Tedious Setup Required to Get You Up and Running
1. Adding "News Tags" to Your Templates
"News tags" allow you to identify individual layers in your title and graphic templates so that you can update text or images in them later. To add "News tags" to your templates:
a. First, open Inscriber TitleMotion.
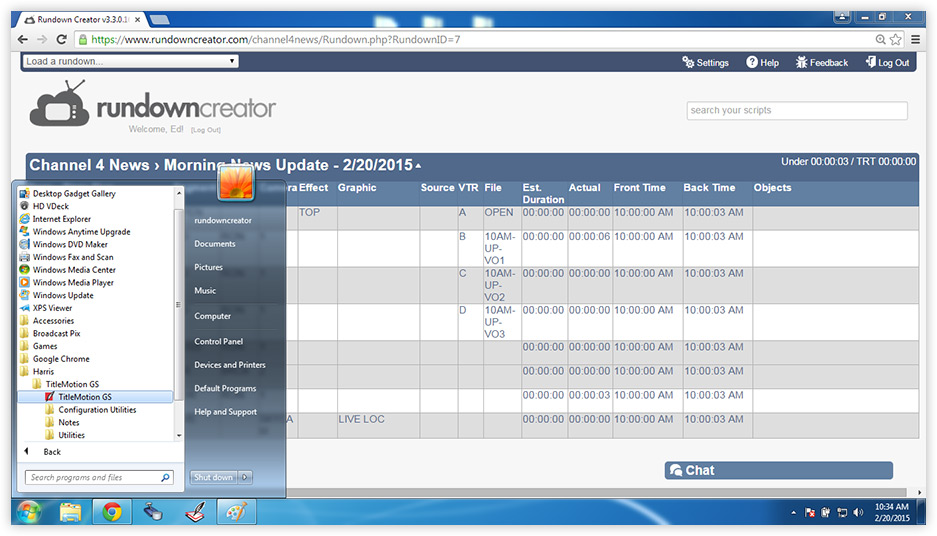
b. Load your template by going to "File" > "Import" > "Import SCRIBE File...".
-or-
Create a new template by going go "File" > "New".
c. Click on the "News Edit" icon. ( )
)
d. Click on each layer of graphics or text in your template.
e. If the text or image layer does not already have a news tag, simply type one into the dialog box and press the "Add" button.
-or-
If the text or image layer does already have one, you can edit it by changing the value in the dialog box and pressing the "Add" button.
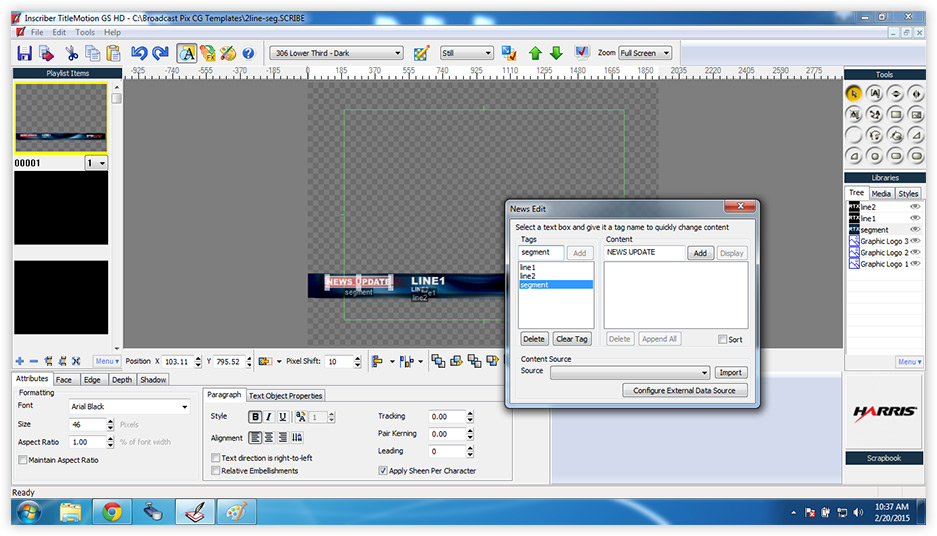
f. Save the template by going to "File" > "Export" > "Export SCRIBE File...".

b. Load your template by going to "File" > "Import" > "Import SCRIBE File...".
-or-
Create a new template by going go "File" > "New".
c. Click on the "News Edit" icon. (
d. Click on each layer of graphics or text in your template.
e. If the text or image layer does not already have a news tag, simply type one into the dialog box and press the "Add" button.
-or-
If the text or image layer does already have one, you can edit it by changing the value in the dialog box and pressing the "Add" button.

f. Save the template by going to "File" > "Export" > "Export SCRIBE File...".
Note: All of your templates must be stored in the same directory. Remember where, because you'll need to enter that into Rundown Creator later.
Creating Script Templates in Rundown Creator
The next thing you'll want to do is create script templates in Rundown Creator for each title or graphic template in TitleMotion. This will allow you to quickly and easily insert them into your scripts in Rundown Creator later.
Note: This step requires administrator privileges in Rundown Creator.
To create a script template:
a. In Rundown Creator, go to "Settings" > "Script Templates".
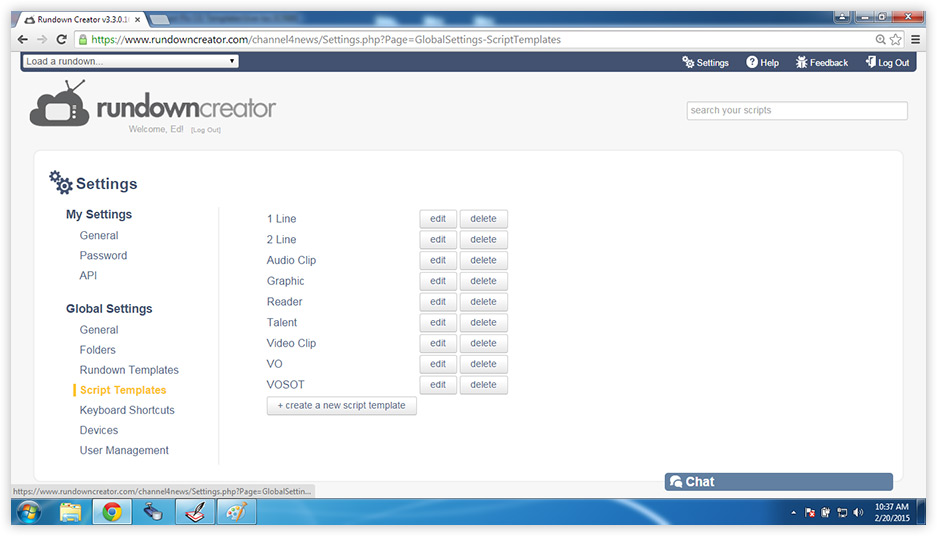
b. Click on the button that says "+ create a new script template" (pictured above). It should be at the bottom of the page.
c. Enter a description in the "Name" field. We'll put "2line-seg" for ours.
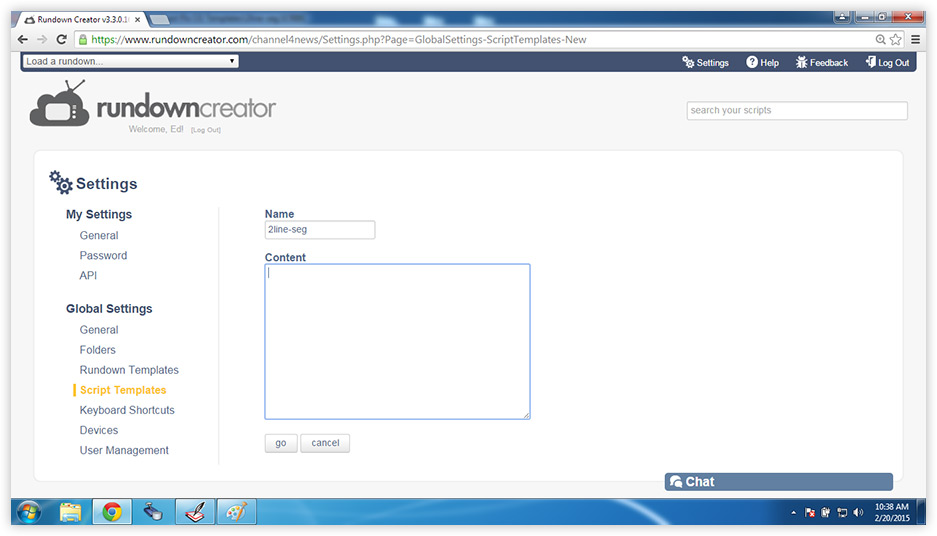
d. Enter the following code in the "Content" field:
e. Replace "your_template_name" with the filename of your .SCRIBE template, without the ".SCRIBE" file extension. For example, if your template's filename is "2line-seg.SCRIBE", you would put "2line-seg".
f. Next, add key/value pairs for each layer of text or graphics in your template that you might like to replace. For example, if your template has two lines of text with the news tags "line1" and "line2", and an image with the news tag "image", then your script template should look like this:
In the example above, all of the values are blank, but if you'd like to enter some default values to override those in the template, you can:
We'll keep things simple, and use the following code for ours:
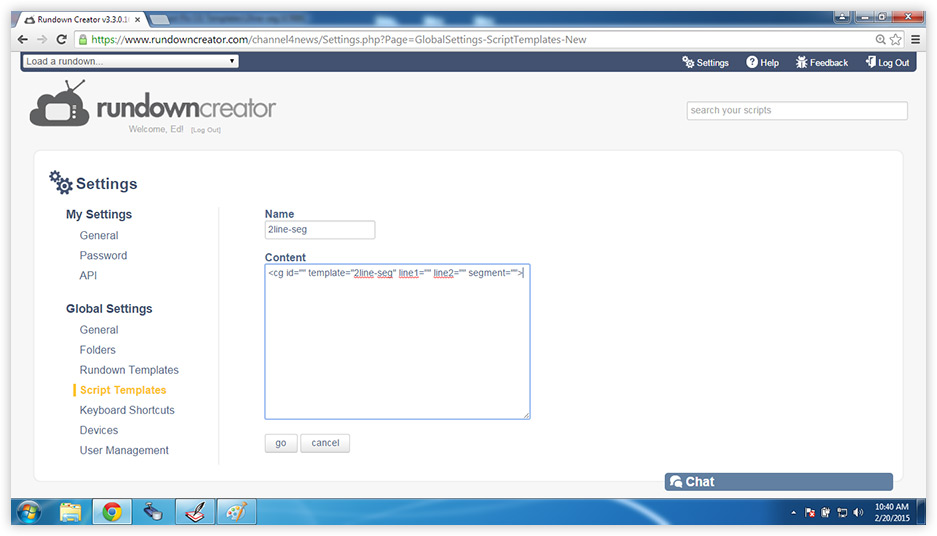
g. Click the "go" button to save the new script template.

b. Click on the button that says "+ create a new script template" (pictured above). It should be at the bottom of the page.
c. Enter a description in the "Name" field. We'll put "2line-seg" for ours.

d. Enter the following code in the "Content" field:
<cg id="" template="your_template_name">
e. Replace "your_template_name" with the filename of your .SCRIBE template, without the ".SCRIBE" file extension. For example, if your template's filename is "2line-seg.SCRIBE", you would put "2line-seg".
<cg id="" template="2line-seg">
f. Next, add key/value pairs for each layer of text or graphics in your template that you might like to replace. For example, if your template has two lines of text with the news tags "line1" and "line2", and an image with the news tag "image", then your script template should look like this:
<cg id="" template="2line-seg" line1="" line2="" image="">
In the example above, all of the values are blank, but if you'd like to enter some default values to override those in the template, you can:
<cg id="" template="2line-seg" line1="Ron Burgundy" line2="Channel 4 News" image="ron.png">
Paths to graphics can be absolute paths like "C:\Graphics\ron.png", or relative paths like "..\ron.png" or "ron.png". When using a relative path, the path is relative to the original image used in the .SCRIBE template.
We'll keep things simple, and use the following code for ours:

<cg id="" template="2line-seg" line1="" line2="" segment="">
g. Click the "go" button to save the new script template.
Note: You must repeat steps 1-2 for all of your title and graphic templates.
The Fun Part (if you're a geek like us)
3. Inserting Titles and Graphics Into Your Scripts
a. In Rundown Creator, open a script by right-clicking on its row in the rundown, and selecting "Edit Script".
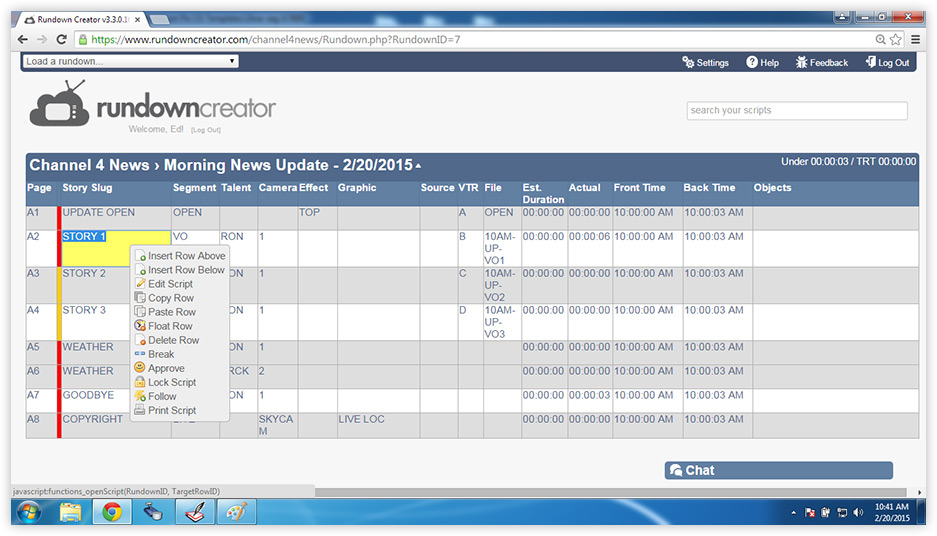
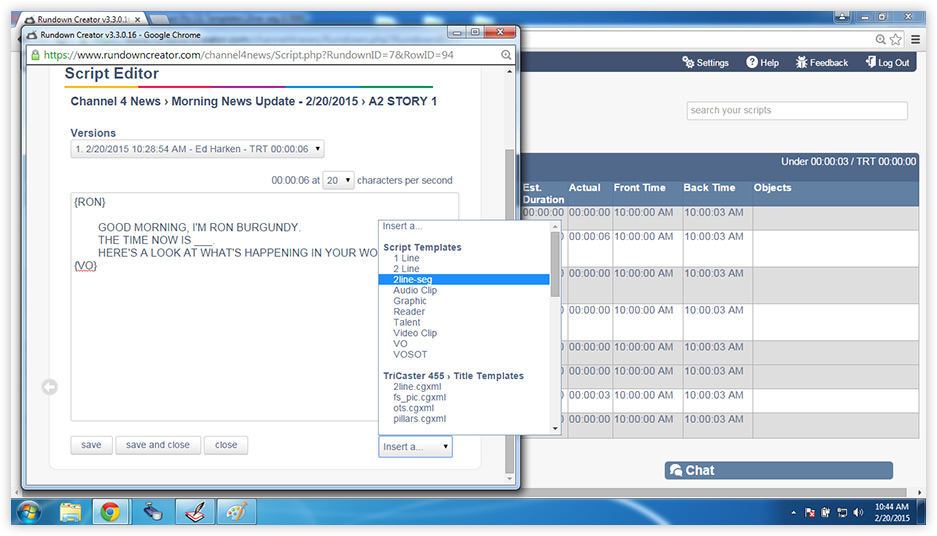
b. Click on the drop-down menu in the lower-right hand corner of the window that says "Insert a...", and select one of the script templates you created earlier.
c. Now, enter data for text or image placeholders.
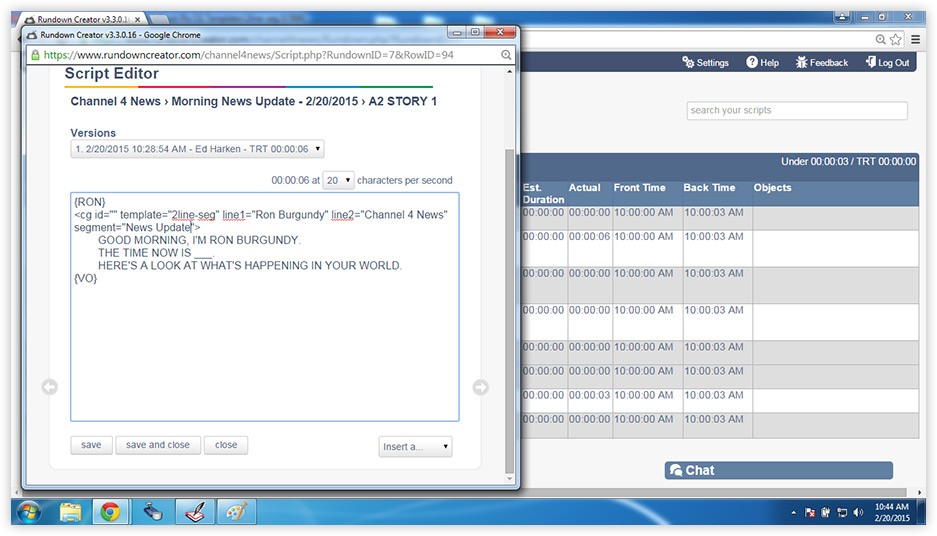
d. Click the "save" button to save your script.

b. Click on the drop-down menu in the lower-right hand corner of the window that says "Insert a...", and select one of the script templates you created earlier.

c. Now, enter data for text or image placeholders.

d. Click the "save" button to save your script.
4. Exporting a Playlist from Rundown Creator to Rapid CG
a. Click on the title/date of your rundown to bring up the rundown menu.
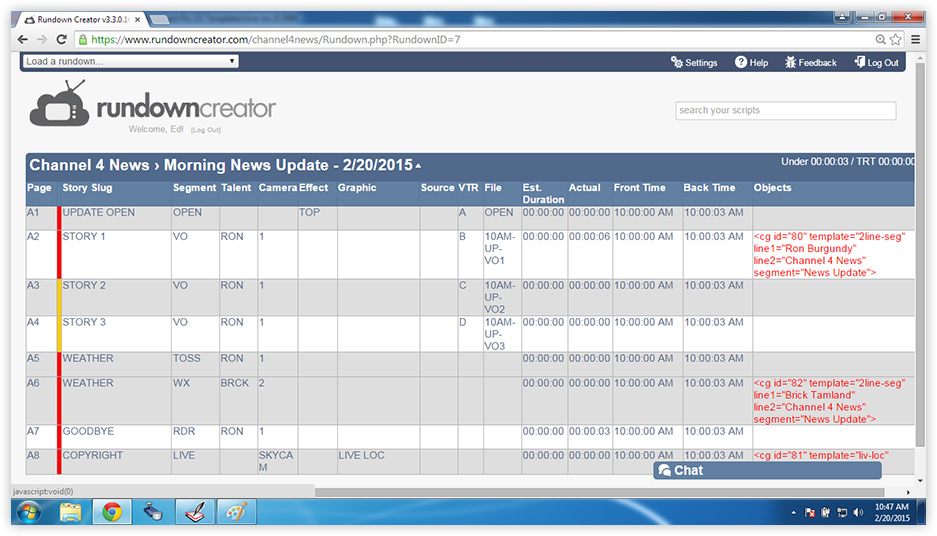
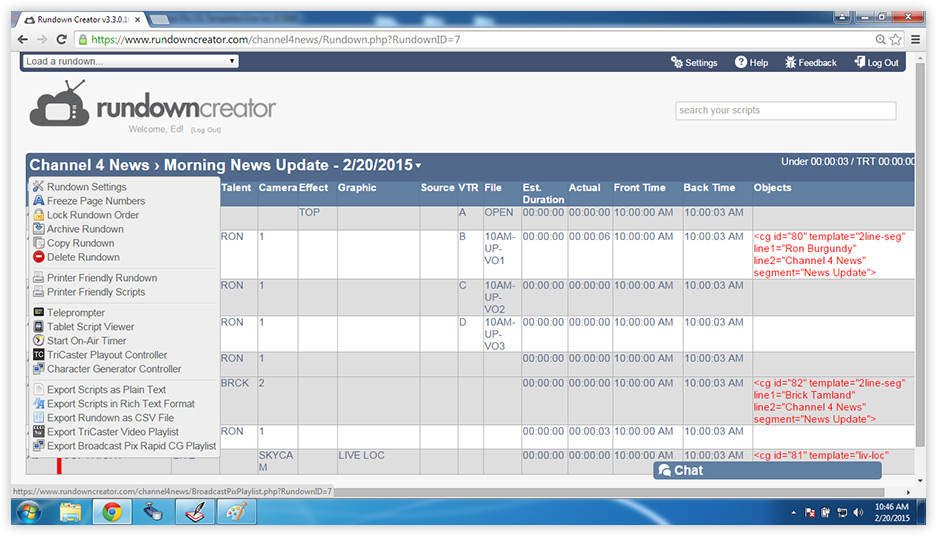
b. Click on the option that says "Export Broadcast Pix Rapid CG Playlist".
c. In the "Directory" field, enter the path of the directory where you saved your .SCRIBE templates earlier.
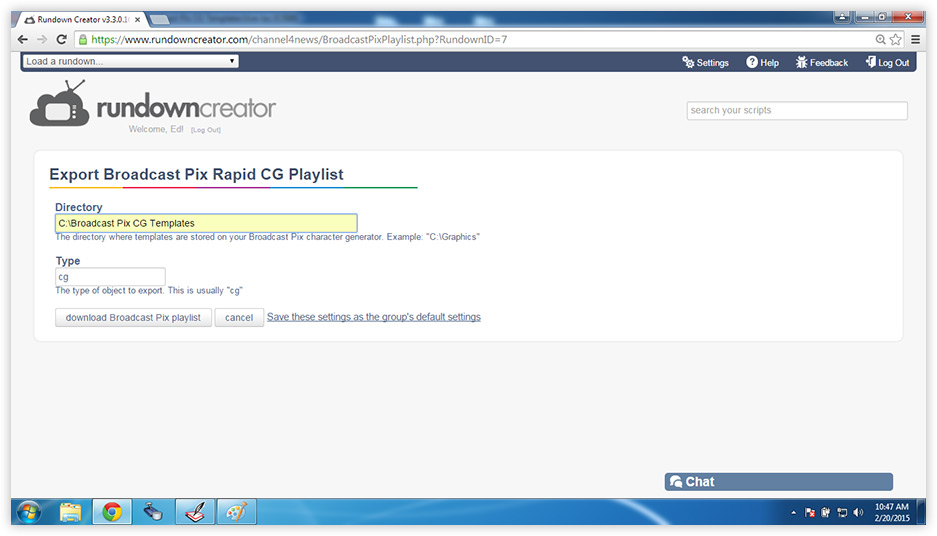
d. Click the button that says "download Broadcast Pix playlist". Your web browser will download a .rci file.
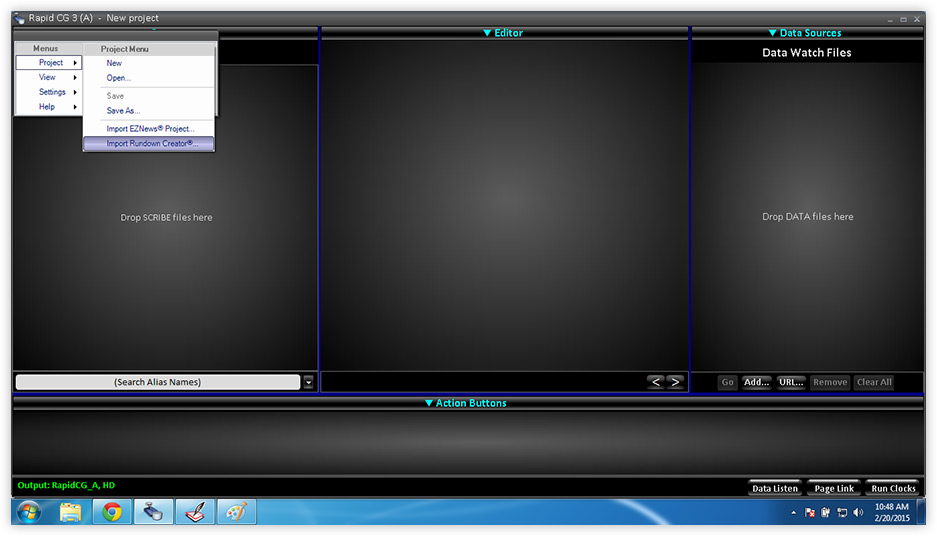
e. To import that file into Rapid CG, open Rapid CG, click on the word "Rapid CG" in the top-left corner of the screen, go to the "Project" menu, click on "Import Rundown Creator", and select the .rci file that was downloaded onto your computer.
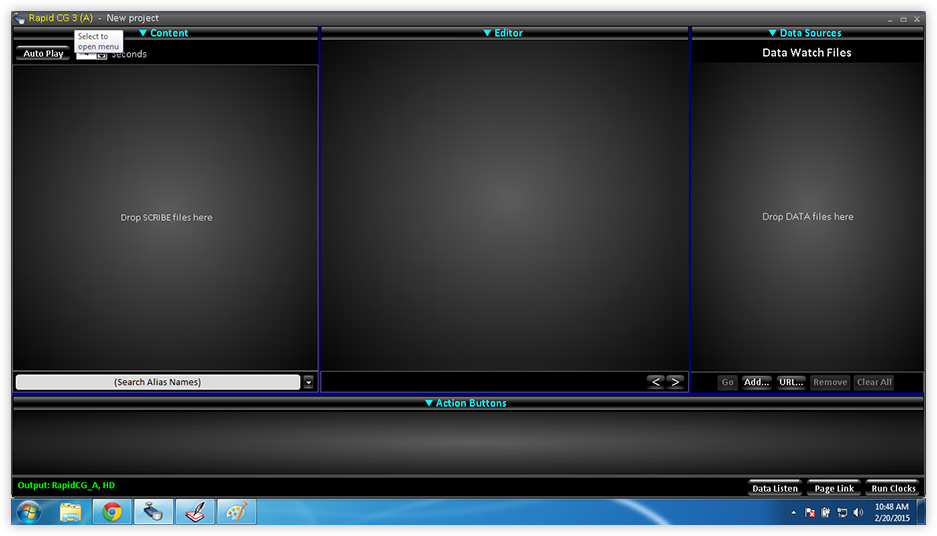
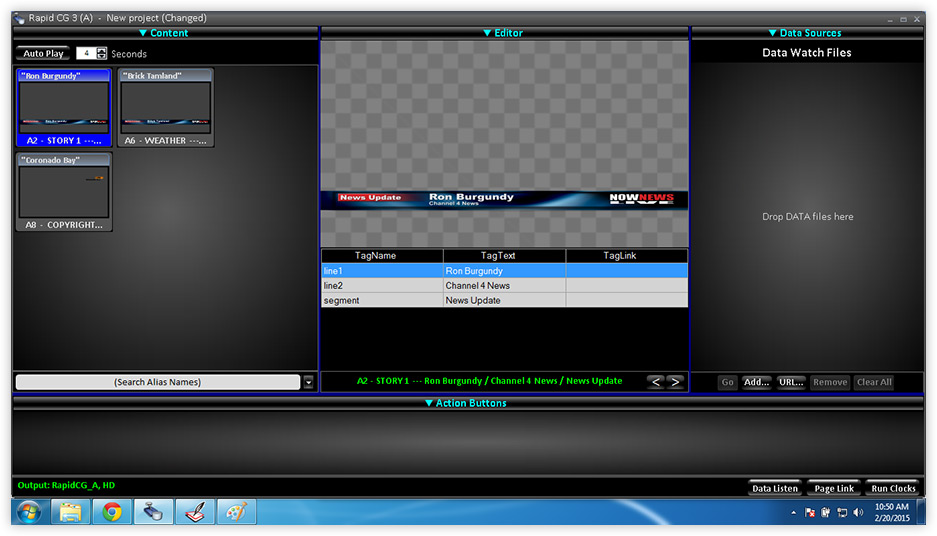
f. Rapid CG should generate a playlist of all of the titles and graphics in your show!

b. Click on the option that says "Export Broadcast Pix Rapid CG Playlist".

c. In the "Directory" field, enter the path of the directory where you saved your .SCRIBE templates earlier.

Note: If you have administrator privileges, you can save this so you and your team don't have to retype it every time you export.
d. Click the button that says "download Broadcast Pix playlist". Your web browser will download a .rci file.
e. To import that file into Rapid CG, open Rapid CG, click on the word "Rapid CG" in the top-left corner of the screen, go to the "Project" menu, click on "Import Rundown Creator", and select the .rci file that was downloaded onto your computer.


f. Rapid CG should generate a playlist of all of the titles and graphics in your show!

